
These are the docs for the Metabase master branch. Some features documented here may not yet be available in the current release. Check out the docs for the current stable version, Metabase v0.60.
Remote sync
Remote sync is only available on Pro and Enterprise plans (both self-hosted and on Metabase Cloud).
Remote Sync lets you develop analytics content in your Metabase and automatically deploy it to a read-only production Metabase through Git. Remote Sync can sync:
- Top-level collections (dashboards, questions, models, metrics)
- Library content (published tables and their segments and measures)
- Snippets
- Transforms
Metabase doesn’t sync any of your data. What it stores in Git are YAML files describing your analytics content. Your actual data stays in your databases and never leaves your Metabase.
How Remote Sync works
Here’s a basic remote-sync workflow:
- Create a dashboard in a Metabase configured in Read-write mode.
- Push it to a Git branch.
- Open a pull request for review.
- Merge the PR to production.
- Your Metabase configured in Read-only mode automatically pulls in the changes.
We’ll cover setting up Remote Sync, an example dev-to-production workflow, branch management, and some other odds and ends.
Key concepts
Remote Sync has two modes for different roles
- Read-write mode: Create and edit content. You can push and pull changes to and from your repository. Multiple Metabase instances can connect in Read-write mode, each working on different branches.
- Read-only mode: Read-only instances only pull changes (typically from your main branch) and don’t allow direct editing of synced content. In Read-only mode, you also can’t edit transforms (transforms are always read-only in this mode—see Configure transforms syncing), can’t edit Library content, and can’t create segments or measures on published tables. You can set up auto-sync to automatically pull approved changes every five minutes.
You choose what to sync
You can sync:
- Your Library
- Transforms
- Any top-level collection under Our Analytics.
- If you use tenants, you can also sync shared collections.
Items in synced collections must be self-contained
For Remote Sync to work properly, synced collections must be self-contained. Everything a dashboard or question needs must be inside one of the synced collections. This includes:
- Questions that reference other questions
- Dashboards with questions
- Click behaviors linking to other items
- Filters that pick values from other questions
- @ mention of other items in documents
Content is stored as YAML files
Remote Sync stores your content as YAML files in your Git repository. Each dashboard, question, model, and document becomes a YAML file that can be reviewed in pull requests and versioned like code.
Remote Sync excludes table metadata
Table metadata doesn’t sync. Table metadata includes things like table names, column types, descriptions, and visibility settings. If you need to version table metadata, use serialization instead.
One branch at a time per Metabase
You can only have one branch at a time per Metabase.
Setting up Remote Sync
You’ll need to be an admin to set up Remote Sync.
- Set up a repository to store your content
- Create a token for your read-and-write Metabase
- Connect your development Metabase to your repository
- Select what to sync
- Push your changes to your repository
- Create a token for your read-only Metabase
- Connect your production Metabase to your repository
- Configure transforms syncing (optional)
1. Set up a repository to store your content
Before you connect Metabase to your Git repository, create a new repository. Supported providers include:
Initialize the repo with a README.md.
2. Create a token for your read-and-write Metabase
Create a personal access token with read and write repository access. Copy the token immediately; you won’t be able to see the token again.
- GitHub: Create a fine-grained personal access token with Contents: Read and write and Metadata: Read-only permissions.
- GitLab: In User Settings > Personal access tokens, create a token with read_repository and write_repository scopes. Tokens have an expiration date (your admin may set a maximum lifetime).
- Bitbucket: In your Atlassian account settings under Security, click Create API token with scopes. Select Bitbucket, search for “repos”, and grant
read:repository:bitbucketandwrite:repository:bitbucket(write does not include read). Tokens expire and can’t be modified after creation.
3. Connect your development Metabase to your repository
You can put any Metabase into Read-write mode. We also offer Development instances that you can use for Remote Sync or any other kind of development.
In the Metabase instance that you use for development:
-
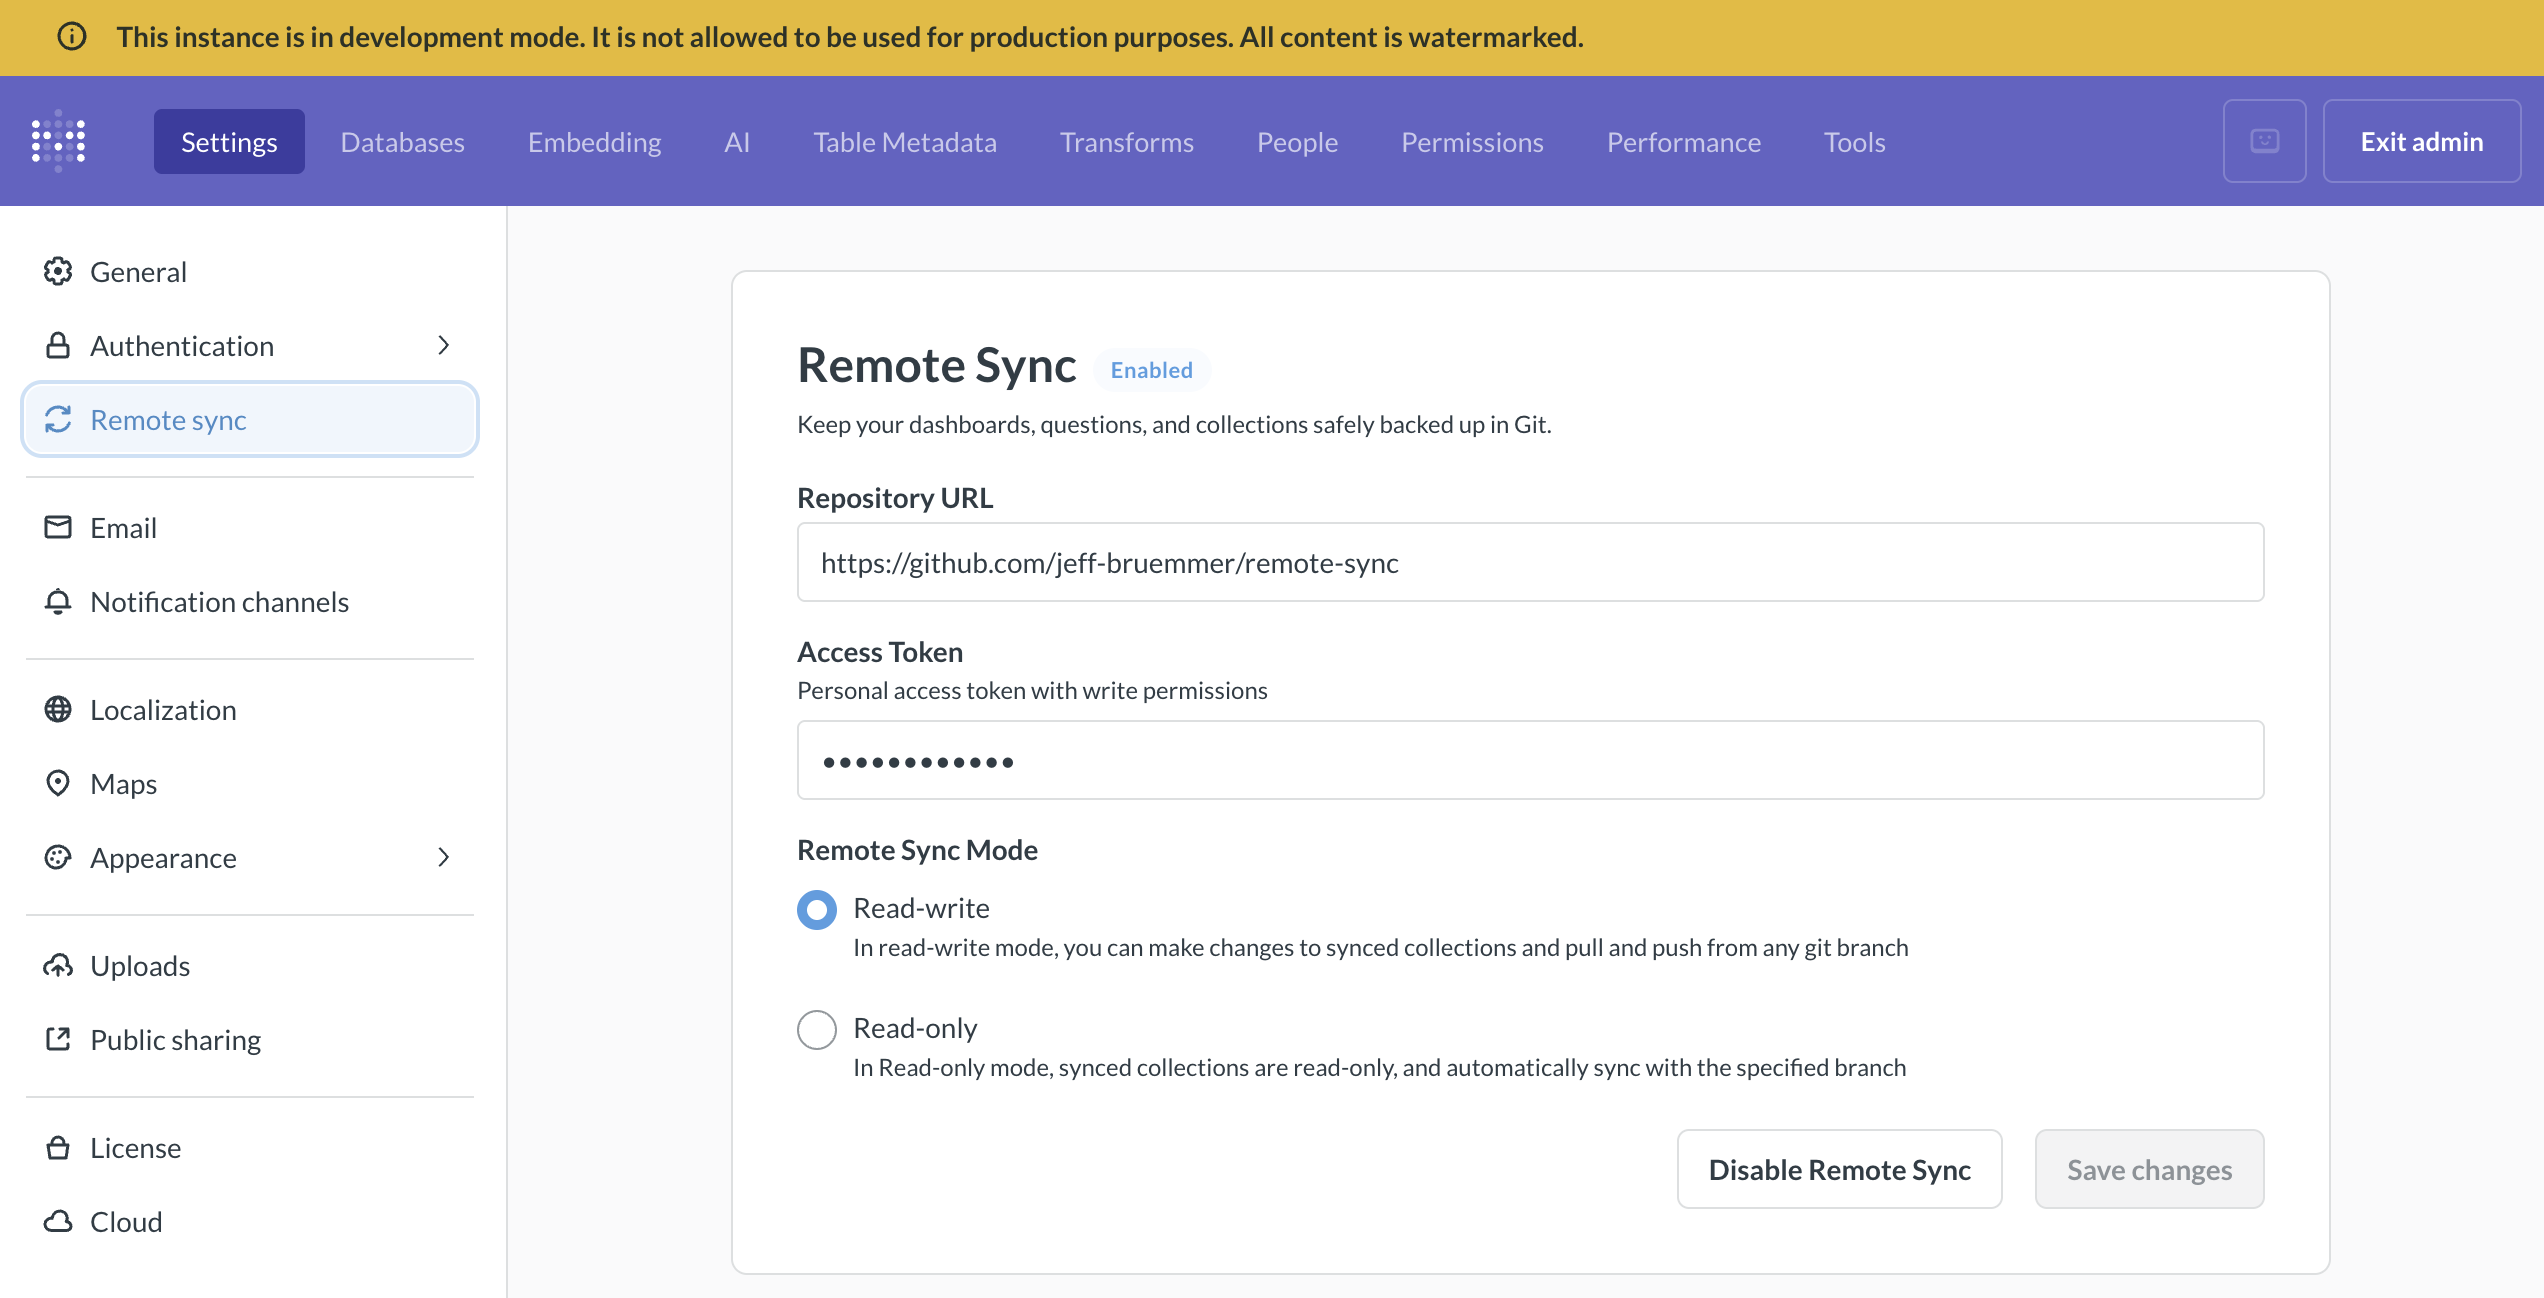
Go to Admin > Settings > Remote sync.
-
Enter your repository URL:
- For example,
https://github.com/your-org/your-repoorhttps://bitbucket.org/your-workspace/your-repo(note thehttps). The repository must already exist and be initialized with at least one commit.
- For example,
-
Select Read-write mode.
-
Add your access token:
- Paste the personal access token (PAT) you created earlier. Make sure the token has read and write permissions. Metabase encrypts your token before storing it.
-
Save and test the connection:
- Click “Save changes”. Metabase will check whether it can reach your repository. If the connection fails, make sure your token has the appropriate permissions and hasn’t expired. If you copied the token incorrectly, generate a new one.
-
(Optional) If you have multi-tenant user strategy enabled, you can also choose which shared collection to sync.
4. Select what to sync
Select what you want to sync.
5. Push your changes to your repository

Once you’ve added content, you’ll see a yellow dot on the synced collections indicating uncommitted changes.
-
At the top of the screen, choose which branch to push to and click the up arrow (push) icon.
-
Enter a commit message describing your changes (e.g., “Added dashboard on mammoth populations”).
-
Click “Push changes” to commit and push your changes to your repository.
Check your repository; you should see the collection.
By default, you’re pushing to your repository’s main branch. However, you can choose (or create) a different branch so you can open pull requests for review. See Branch management for details on creating and switching branches.
6. Create a token for your read-only Metabase
Create a personal access token with read-only repository access. Copy the token immediately; you won’t be able to see the token again.
- GitHub: Create a fine-grained personal access token with Contents: Read-only and Metadata: Read-only permissions.
- GitLab: In User Settings > Personal access tokens, create a token with read_repository scope only.
- Bitbucket: In your Atlassian account settings under Security, click Create API token with scopes. Select Bitbucket and grant
read:repository:bitbucketonly.
7. Connect your production Metabase to your repository
In your production Metabase instance:
-
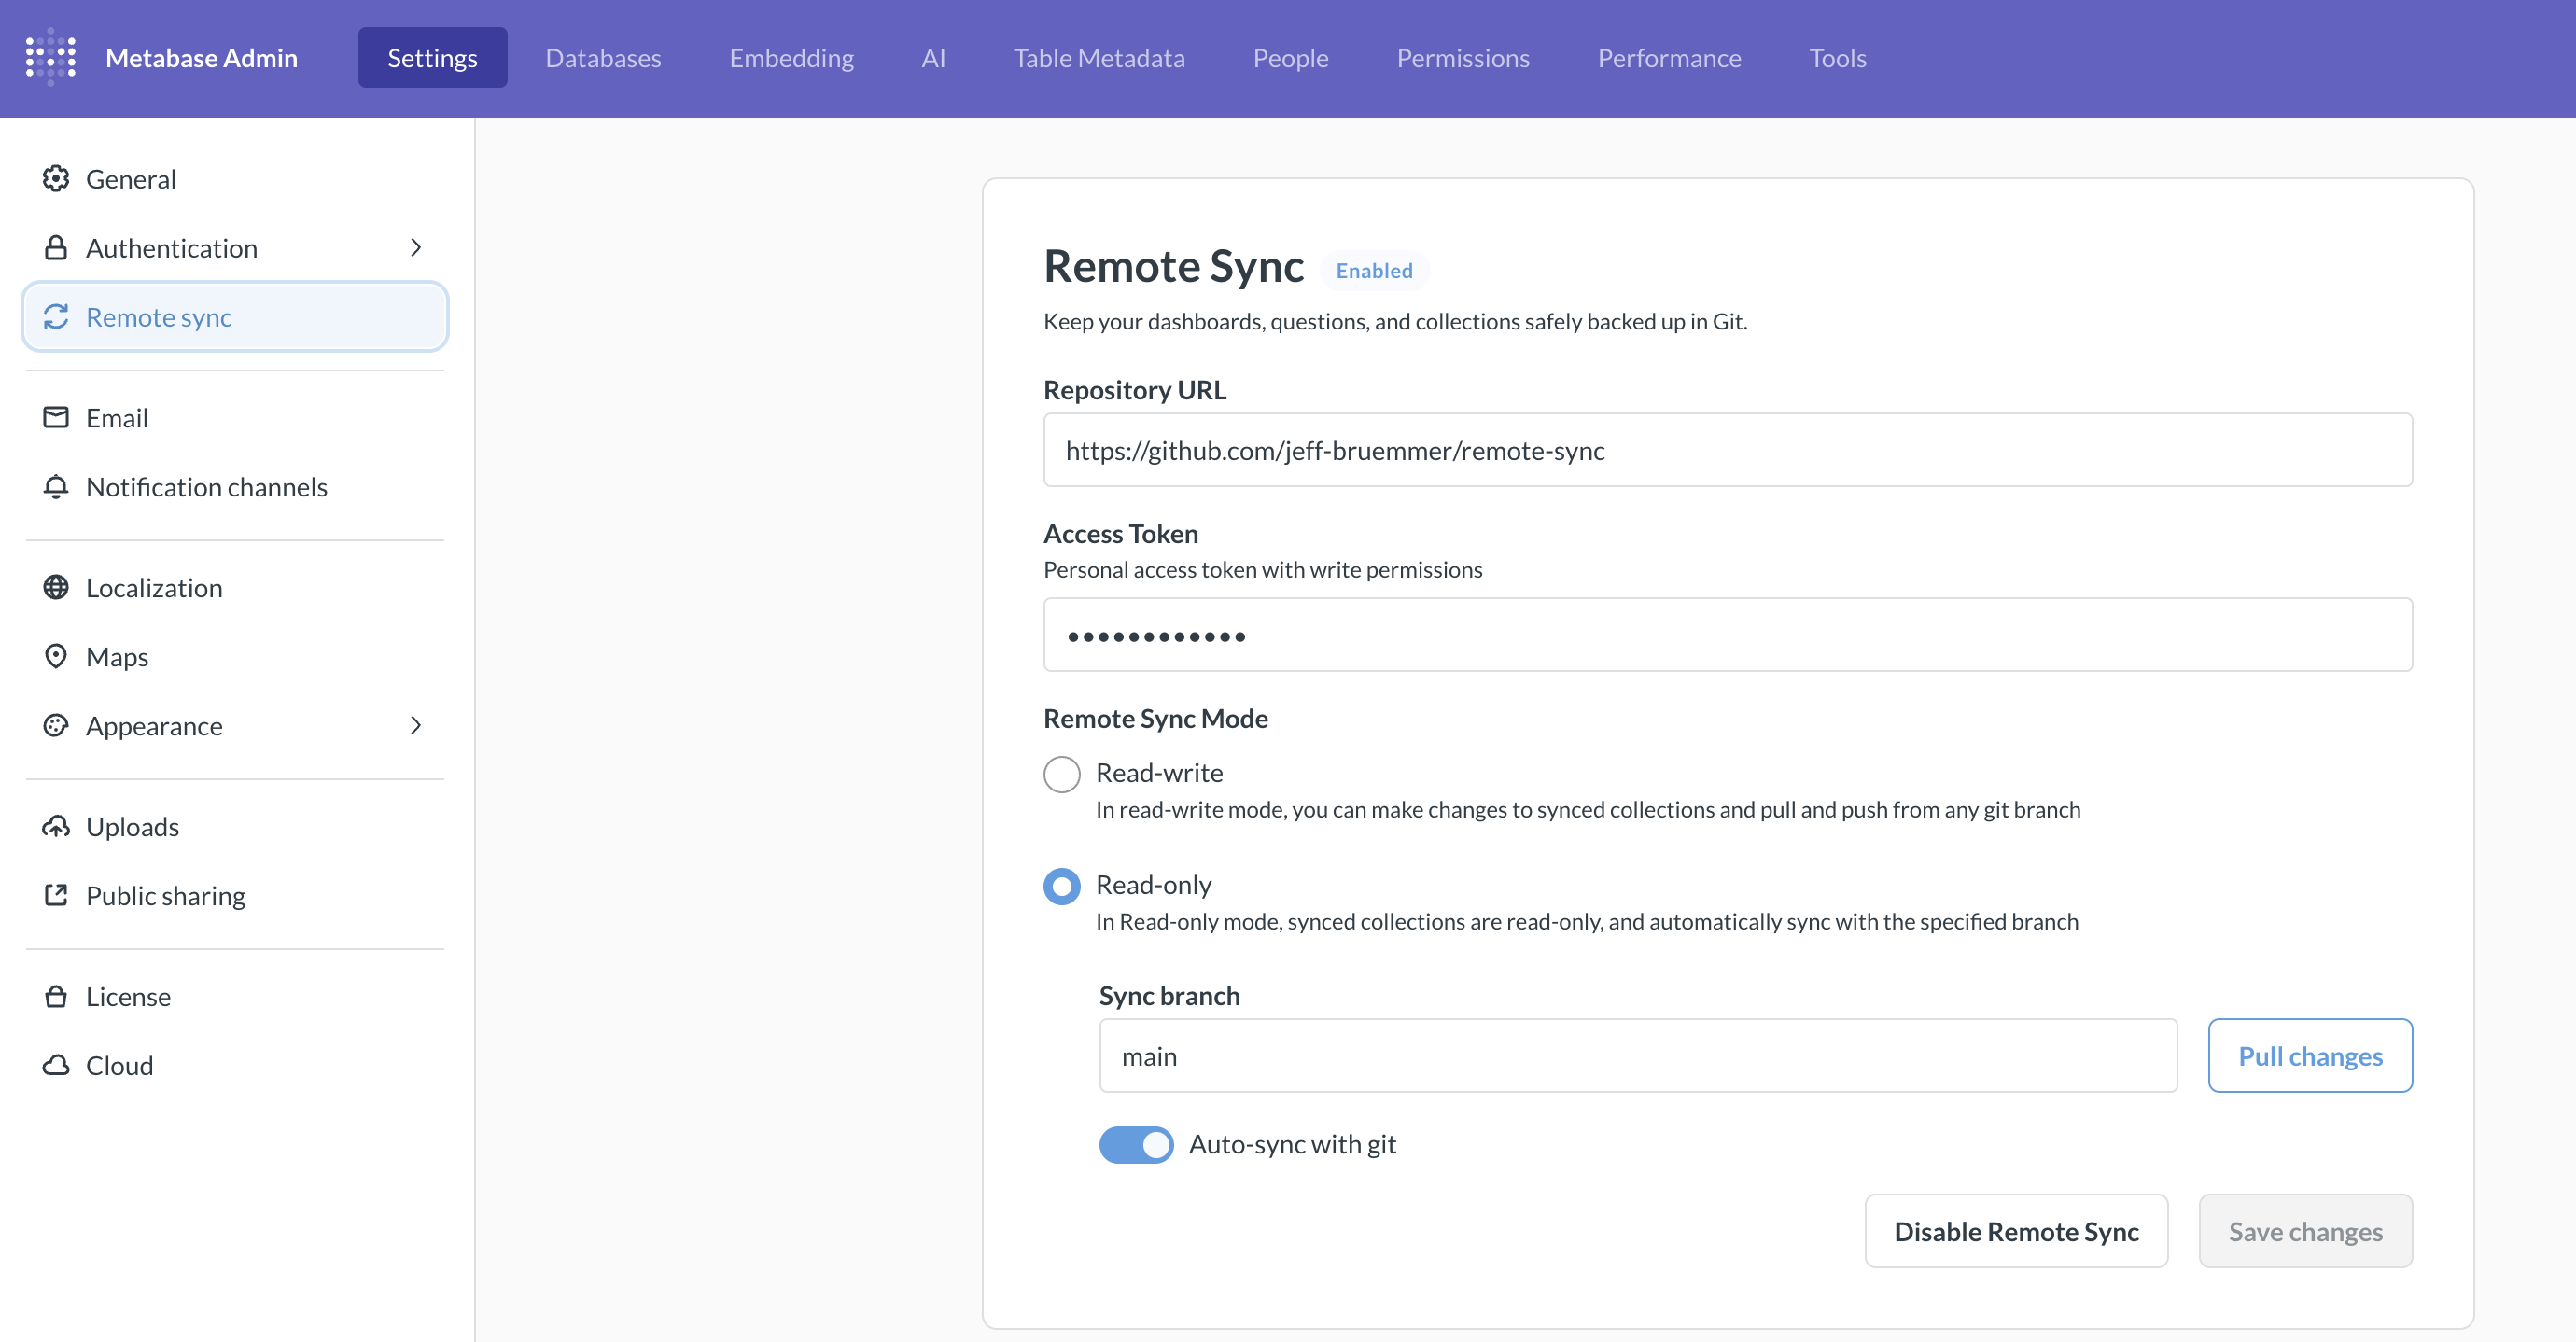
Go to Admin > Settings > Remote sync.
-
Enter your repository URL:
- Use the same repository as your development Metabase, for example,
https://github.com/your-org/your-repo(note thehttps).
- Use the same repository as your development Metabase, for example,
-
Select Read-only mode.
-
Add your access token:
- Paste the read-only personal access token you created for this production Metabase.
-
Save and test the connection:
- Click “Save changes”. Metabase will verify it can reach your repository. If the connection fails, verify your token has the appropriate permissions and hasn’t expired.
-
Sync your content:
- Click “Pull changes” to immediately sync content from your repository.
- To keep your production instance automatically updated, toggle on “Auto-sync with Git”. Metabase will pull changes from your main branch every five minutes.
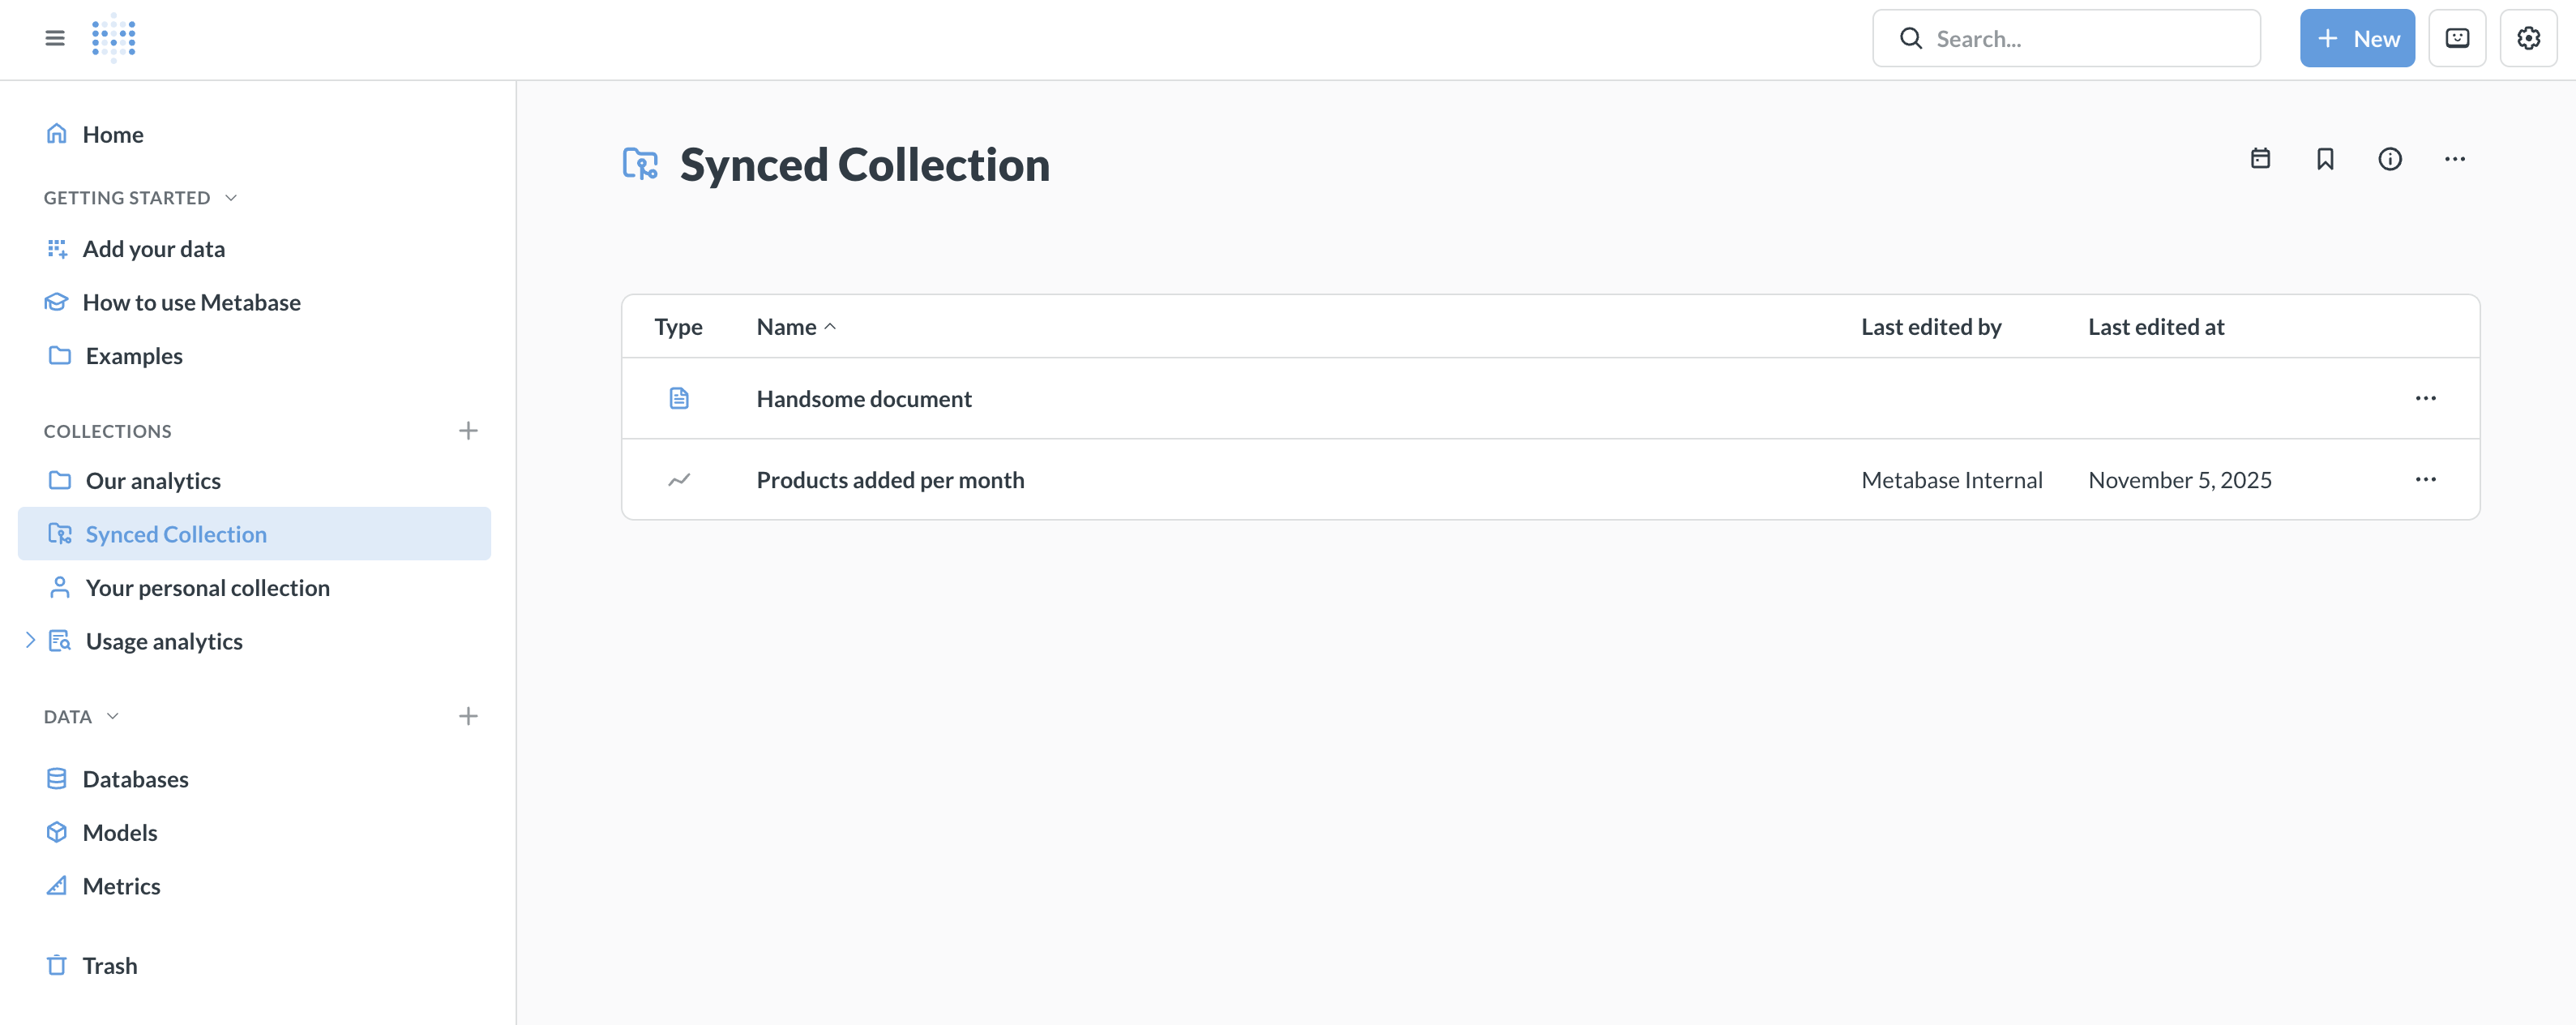
In Read-only mode, synced collections appear in the regular collections list with a special icon to indicate that they’re versioned and read-only.
At this point, you should be all set up. Exit Admin, then reload your browser. You should see your synced collections in your production Metabase.
8. Configure transforms syncing (optional)
To version your data transformation logic, you can sync your Transforms, including all your tags and jobs. Some things to keep in mind:
- Transform syncing is all or nothing: Metabase will sync your entire transforms namespace. You can’t selectively sync specific transform folders.
- This setting only determines whether Metabase pushes transforms from Read-write mode. When you pull from a repository, all content present in the repo is loaded—including any transforms—regardless of this setting. Think of it like pulling a repo that has a new collection you hadn’t previously synced: the setting doesn’t filter what comes in, only what goes out. -You can’t edit transforms in read-only mode., even if you haven’t explicitly turned on transform syncing. Keeping transforms read-only prevents unintended overwrites on subsequent pulls.
- Use different databases for dev and production. If you use transforms with Remote Sync, your development and production Metabases should connect to separate databases that share identical schemas. If you use the same database for both, dev transforms would also change production data.
An example dev-to-production workflow
Let’s say your team wants to build a new analytics dashboard. Here’s a workflow that ensures all production content goes through a review process.
Step 1: Create a new branch
In your development Metabase, click the branch dropdown at the top of the screen to create a new branch for your work, like feature/megafauna-dashboard.
Step 2: Create content in your development Metabase
Create a dashboard called “Megafauna Analytics” and add some questions. Save the questions either to the dashboard itself or to a synced collection. Save the dashboard to a synced collection.
Step 3: Push to your development branch
- You should see a yellow dot on your synced collection (indicating local changes).
- Click the up arrow (push) icon at the top of the screen.
- Enter a commit message: “Add Megafauna Analytics dashboard”.
- Metabase commits your changes to the branch you’re working on and pushes them to your repo.
Step 4: Create a pull request
In your Git repository:
- Create a pull request from your branch,
feature/megafauna-dashboard, to the main branchmain. - Review the changes to the YAML files representing your dashboards and questions.
- Someone who knows what they’re doing approves and merges the PR.
Step 5: Production automatically updates
On your production Metabase instance:
- Within five minutes, Auto-sync detects the new commits on
main(you can also manually import the changes). - The “Megafauna Analytics” dashboard appears in production with all its questions.
- The content is read-only (people can view and use it, but can’t edit it).
How synced collections work in Read-write mode
- Synced collections in the UI
- Moving and deleting content in synced collections
- Items in synced collections must be self-contained
Synced collections in the UI
You can select any top-level collection under Our Analytics to sync with Git. Synced collections show their current state with visual indicators: a yellow dot indicates unsynced local changes that need to be committed. At the top of the screen, you’ll see up/down arrows that provide sync controls for pulling and pushing changes.
If you are using tenants, you can also sync shared collections. You’ll see the same yellow dot indicator for shared collections.
In Read-only mode, synced collections appear in the regular collections list (not in a separate “Synced Collections” section) with a special icon to indicate they’re versioned and read-only.
When transforms syncing is enabled, you’ll find your transforms in the Transforms section of the Admin settings. Synced transforms are also read-only in Read-only mode.
Moving and deleting content in synced collections
When you remove content from a synced collection in Read-write mode and push that change, the content will also be removed from your production instance when it syncs. This applies to moving content out of a synced collection or deleting it entirely.
Content in other Metabases that depended on this item may break since the dependency will no longer be in a synced collection.
Making sub-collections appear at the top level
Sometimes you might want synced content to appear at the top level of your navigation rather than nested under a synced collection. If you use Tenants, you can accomplish that with synced shared collections.
If you aren’t using tenants, you can use permissions to control how the collection hierarchy appears to different groups.
-
Organize content in sub-collections of your synced collection. For example, you might have
Analytics/Mammoth StatisticsandAnalytics/Giant Sloth Statistics. -
In your production Metabase, set up permissions for embedded groups: Groups should have:
- No view access to the top-level synced collection itself
- View access to specific sub-collections within the synced collection
For groups with these permissions, the sub-collections they can access will appear at the top level of navigation, as if they were root-level collections. They won’t see the top-level synced collection that you have in your development Metabase.
What you see in Read-write mode:
Collections
└── Analytics
    ├── Mammoth Statistics
    ├── Giant Sloth Statistics
What embedding groups see in Read-only mode (with no access to Analytics, but access to Mammoth Statistics and Giant Sloth Statistics):
Collections
├── Mammoth Statistics
└── Giant Sloth Statistics
What Metabase syncs
Remote Sync uses the same serialization format as the Metabase CLI serialization feature, storing your content as YAML files in your Git repository.
What syncs:
- Dashboards and their cards
- Questions (saved queries and models)
- Model metadata (column descriptions, display settings, etc.)
- Documents
- Timelines and events
- Collection structure and metadata
- Library content (published tables, metrics, snippets, segments, measures)
- Transforms (including jobs and folders)
What doesn’t sync:
- Users, groups, and permissions
- Alerts and subscriptions
- Database connections
- Personal collections
- Table metadata (table names, column types, descriptions, visibility settings, etc.)
Branch management
Branching is only available in Read-write mode.
Creating a branch
You can create branches in Metabase or directly in your Git repository. Branches created in Git will appear in the Metabase branch dropdown once Metabase syncs with your repository.
Before creating branches, push an initial commit to your main branch.
To create a new branch in Metabase:
- Click the branch dropdown at the top of the screen.
- Type a name for the new branch in the search box.
- Press Enter to create the branch.
The new branch is created from your current commit (not the latest commit from the remote).
Switching branches
At the top of the screen, you’ll see a branch dropdown:
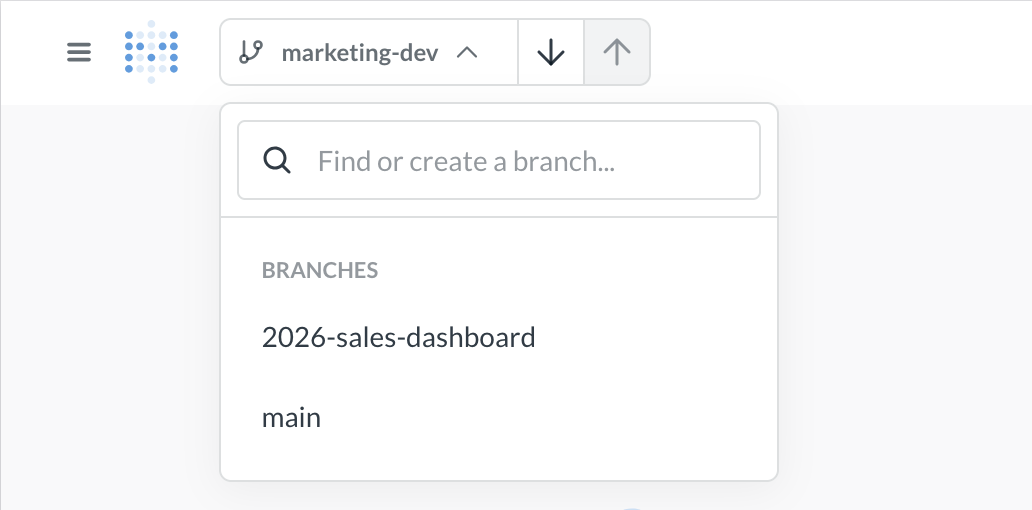
- Click the branch dropdown to see available branches.
- Select a different branch. This will change the branch for everyone in your Metabase (see limitations).
If the branch doesn’t appear, ensure it exists in your Git repository and that the name matches exactly (branch names are case-sensitive).
If you have unsynced changes, Metabase will show a dialog asking what you want to do:
- Push changes to the current branch: Commits your changes to the current branch before switching.
- Create a new branch and push changes there: Saves your work to a new branch, keeping the original branch clean.
- Discard these changes: Throws away your uncommitted changes (can’t be undone).
The dialog shows you exactly which items have changed, so you can make an informed decision.
If you switch modes (from Read-write to Read-only or vice versa) with unpushed changes, you’ll be prompted to save or discard them. You cannot switch to Read-only mode with uncommitted changes.
If changes don’t appear after switching modes: Hard refresh your browser (Cmd/Ctrl + Shift + R).
Branching limitations
- Only admins can manage branches. Non-admins won’t see the branch dropdown at all.
- The current branch is instance-wide. This means that everyone on the same Metabase is on the same branch at the same time. You can’t have different people working on different branches in a single Metabase.
Limiting a Metabase to a single branch at a time means that the typical Git feature-branch workflow is a bit different here: only admins can switch branches, create new branches, or push and pull changes. If you need multiple branches worked on simultaneously, the workaround is to spin up multiple Metabases in Read-write mode, one Metabase per branch.
Pushing changes to Git
You can only push changes in a Metabase with Remote Sync set to Read-write mode.
Committing and pushing your changes
When you make changes to items in a synced collection, a yellow dot appears on your synced collection (indicating uncommitted changes). To commit and push your changes:
- Click the up arrow (push) icon at the top of the screen (make sure you’re pushing to the right branch).
- Enter a descriptive commit message explaining your changes.
- Click “Continue” to push your changes to Git.
If you see a message that “Remote is ahead of local”, that means someone else pushed to the branch from another Metabase in Read-write mode. Pull the latest changes before pushing again.
Pulling changes from Git
You can pull changes when in Read-write or Read-only mode.
In Read-write mode, you can get the latest changes from your Git repository:
- Click the down arrow (pull) icon at the top of the screen.
- Review any summary of incoming changes if shown.
- Confirm the import.
- Metabase updates your collections with the latest content from Git.
If changes don’t appear after pulling:
- Verify you’re on the correct branch.
- Hard refresh your browser (Cmd/Ctrl + Shift + R).
- If you encounter sync errors, review error messages in the sync dialog, manually resolve conflicts in your Git repository, then pull again.
In Read-only mode, go to Admin > Settings > Remote sync and click Pull changes.
Handling unsynced changes
If you have local uncommitted changes when trying to pull or switch branches, Metabase will prompt you with options:
- Push changes to the current branch: Commit your changes first, then proceed.
- Create a new branch and push changes there: Preserve your work on a new branch.
- Discard these changes: Throw away your uncommitted changes to accept what’s in Git.
When in doubt, create a new branch and push changes to that branch. That way you won’t lose any work.
Pulling changes automatically
In Read-only mode, you can set Metabase to auto-sync changes from your main branch.
- Navigate to Admin > Settings > Remote sync.
- Enable Auto-sync with Git.
By default, Metabase will check for and pull changes from the branch you specify every five minutes. You can also manually sync as needed.
Disabling Remote Sync
To disable Remote Sync:
- Go to Admin > Settings > Remote sync.
- Click Disable Remote Sync.
- In the confirmation dialog, click Disable.
- All remote sync settings are cleared, including the repository URL, access token, and branch information.
- Your synced collections and their content remain in your Metabase (they’re not deleted).
- Synced collections become regular collections that you can edit like any other collection.
- You can re-enable Remote Sync later by reconnecting to a repository, but any changes you made to the collection after disabling can be overwritten if you enable sync again.
Migrating existing content to Remote Sync
If you already have content in your Metabase, you can gradually adopt Remote Sync. Content that lives outside synced collections remains unaffected—you can continue working with it normally while you migrate content into a synced collection over time.
Make sure you move any dependencies (like models referenced by questions) into synced collections, since synced content must be self-contained.
If you already have a repo with serialized Metabase data
Keep doing what you’re doing.
If you want to switch fully to Remote Sync, we recommend starting with a new repo:
- Check out a new branch in your Metabase instance in Read-write mode.
- Import your data to your Metabase instance with the serialization command as you normally would.
- Move the content you want to sync into a synced collection.
- Push up your changes to the new repo.
Remote Sync does NOT sync table metadata, so if you’re importing and exporting your table metadata, you should stick with serialization.
Further reading
Read docs for other versions of Metabase.